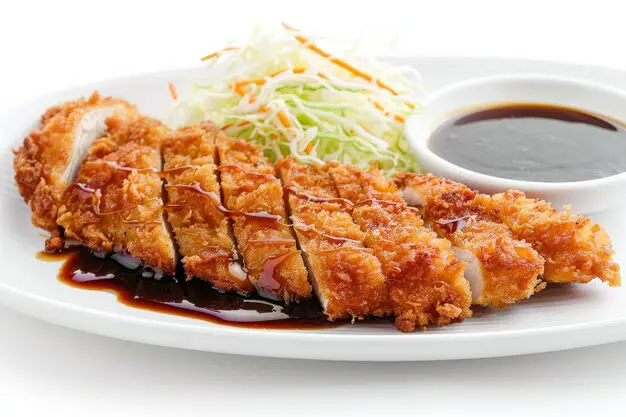
Hey there, food lovers! Today, we’re diving into the world of Japanese cuisine with a super tasty and easy-to-make dish: Chicken Katsu. If you’re craving something crispy, juicy, and totally satisfying, you’re in for a treat. Let’s get cooking!
Table of Contents
What is Chicken Katsu?
Before we jump into the recipe, let’s talk about what Chicken Katsu actually is. Chicken Katsu is a popular Japanese dish that’s basically a crispy, breaded chicken cutlet. It’s like the Japanese version of chicken schnitzel or chicken nuggets, but way better!
The word “katsu” comes from the English word “cutlet,” and it’s usually made with chicken or pork. Today, we’re focusing on the chicken version because, well, who doesn’t love chicken?
Why You’ll Love This Recipe
- It’s super crispy on the outside and juicy on the inside.
- You can make it with simple ingredients you probably already have.
- It’s a crowd-pleaser – kids and adults both love it!
- It’s versatile – you can serve it with different sides and sauces.
- It’s easier to make than you might think!
Ingredients You’ll Need
Okay, let’s gather our ingredients. For this Chicken Katsu recipe, you’ll need:
For Chicken:
- 4 boneless, skinless chicken breasts
- Salt and pepper to taste
- 1 cup all-purpose flour
- 2 large eggs, beaten
- 2 cups panko breadcrumbs
- Vegetable oil for frying
- Optional: 1 teaspoon garlic powder
- Optional: 1 teaspoon onion powder
For the Katsu Sauce:
- 1/2 cup ketchup
- 2 tablespoons Worcestershire sauce
- 1 tablespoon soy sauce
- 1 tablespoon mirin (sweet rice wine)
- 1 teaspoon sugar
Equipment You’ll Need
- A large skillet or frying pan
- Three shallow dishes for the breading station
- A meat mallet or rolling pin
- Paper towels
- A whisk (for the sauce)
Step-by-Step Instructions
Now, let’s get cooking! Follow these simple steps to make your very own Chicken Katsu:
- Prepare the Chicken
- First things first, we must prepare our chicken.
- Take your chicken breasts and place them between two pieces of plastic wrap.
- Using a meat mallet or rolling pin, gently pound the chicken until it’s about 1/2 inch thick.
- This step is important because it helps the chicken cook evenly and makes it more tender.
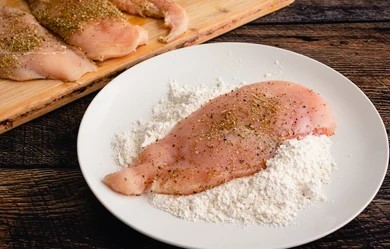
- Once you’ve flattened the chicken, season both sides with salt and pepper.
- If you’re using garlic and onion powder, sprinkle those on too.
- Set the seasoned chicken aside while we set up our breading station.
- Set Up the Breading Station
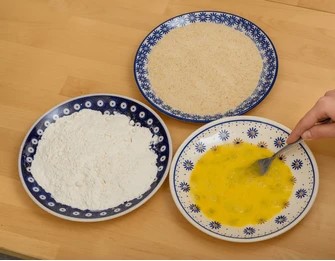
Breading the chicken is what gives Chicken Katsu its signature crispy coating. To make this process easy and less messy, we’re going to set up a breading station. Here’s how:
- In one shallow dish, put your flour.
- In another dish, beat your eggs.
- In the third dish, pour your panko breadcrumbs.
- Line these dishes up in order: flour, egg, panko. This will be your assembly line for breading the chicken.
- Bread the Chicken
Now comes the fun part! Take each piece of seasoned chicken and:
- Dip it in the flour, making sure it’s completely coated. Shake off any excess.
- Next, dip it in the beaten egg, again making sure it’s fully covered.
- Finally, place it in the panko breadcrumbs. To ensure that the breadcrumbs stick properly, press them onto the chicken.
- Repeat this process with all your chicken pieces.
- If you have time, let the breaded chicken rest in the fridge for about 15 minutes.
- This improves the coating’s sticking power during fried.
- Fry the Chicken
It’s time to fry! Here’s how to get that perfect golden-brown crust:
- In a big skillet, heat up about 1/4 inch of vegetable oil over medium heat.
- The oil should be heated but not smoking.
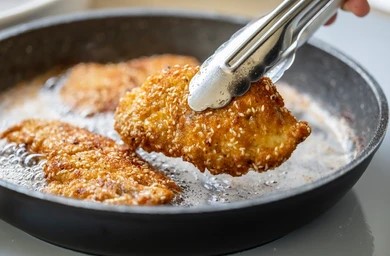
- Place the breaded chicken into the heated oil with caution. Avoid packing the pan too full; you may have to cook in batches.
- Fry until the chicken is cooked through and golden brown, 3 to 4 minutes on each side. A temperature of 165°F (74°C) should be reached inside.
- After cooking, move the chicken to a dish covered with paper towels so that any leftover oil may be drained.
- Make the Katsu Sauce
While your chicken is resting, let’s whip up that delicious Katsu sauce. It’s super simple:
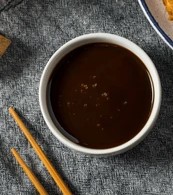
- Combine the ketchup, sugar, mirin, soy sauce, and Worcestershire sauce in a small bowl.
- Taste and adjust the flavors if needed. You might want it a bit sweeter or saltier depending on your preference.
6. Serve and Enjoy!
Your Chicken Katsu is ready to eat! Here’s how to serve it:
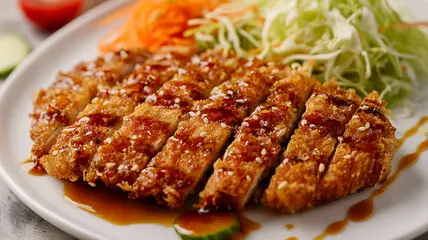
- Slice the chicken into strips (this is traditional, but you can leave it whole if you prefer).
- Serve it with a side of steamed rice and some fresh vegetables like shredded cabbage or a simple salad.
- Don’t forget to drizzle that yummy Katsu sauce over the top or serve it on the side for dipping.
And there you have it – homemade Chicken Katsu that’s crispy, juicy, and absolutely delicious!
In air fryer:
Prepare the air fryer:
- Preheat air fryer to 375°F (190°C)
- Apply a thin layer of cooking spray to the air fryer basket.
Cook the chicken:
- Put the breaded chicken inside the air fryer basket.
- Apply a little layer of cooking spray to the chicken’s top.
- Cook for 10-12 minutes
- Flip halfway through cooking and spray the other side
- Cook until golden brown and internal temperature reaches 165°F (74°C)
Tips for air fryer cooking:
- Don’t overcrowd the basket. Cook in batches if necessary.
- Shake the basket or flip the chicken halfway through for even cooking.
- Check doneness with a meat thermometer to ensure it’s fully cooked.
- Adjust cooking time based on the thickness of your chicken and your specific air fryer model.
- For extra crispiness, you can spray with a bit more cooking spray halfway through.
Benefits of air frying:
- Uses significantly less oil than traditional frying
- Still achieves a crispy exterior
- Potentially lower in calories and fat
- Less mess and easier cleanup
The air fryer method produces a Chicken Katsu that’s crispy on the outside and juicy on the inside, similar to the traditional fried version but with less oil. It’s a great option for those looking for a healthier cooking method or who prefer not to deal with large amounts of hot oil.
Tips for Perfect Chicken Katsu
Want to take your Chicken Katsu game to the next level? Here are some pro tips:
- Don’t skip the pounding: Flattening the chicken ensures even cooking and tender meat.
- Season well: Don’t be shy with the salt and pepper. Well-seasoned chicken makes all the difference.
- Use panko breadcrumbs: Regular breadcrumbs work, but panko gives that extra crispy texture we’re looking for.
- Check your oil temperature: If it’s too hot, the outside will burn before the inside cooks. Too cool, and your katsu will be greasy. Aim for around 350°F (175°C) if you have a thermometer.
- Don’t overcrowd the pan: Frying in batches keeps the oil temperature steady and gives each piece room to get crispy.
- Let it rest: After frying, let the chicken rest for a few minutes. This helps the juices redistribute, making every bite juicy and delicious.
Nutrition Chart
I’ll provide an approximate nutrition chart for one serving of Chicken Katsu. Please note that these values are estimates and can vary based on specific ingredients and preparation methods. This chart assumes the recipe serves 4 and includes the katsu sauce, but not any side dishes like rice or vegetables.
Nutrition Chart for 1 serving of Chicken Katsu (approximately 1 chicken breast):
| Nutrient | Amount | % Daily Value* |
|---|---|---|
| Calories | 450-500 | |
| Total Fat | 22-25g | 28-32% |
| – Saturated Fat | 4-5g | 20-25% |
| – Trans Fat | 0g | |
| Cholesterol | 145-155mg | 48-52% |
| Sodium | 600-700mg | 26-30% |
| Total Carbohydrate | 30-35g | 11-13% |
| – Dietary Fiber | 1-2g | 4-7% |
| – Sugars | 5-7g | |
| Protein | 35-40g | 70-80% |
| Vitamin A | 2-4% | |
| Vitamin C | 2-4% | |
| Calcium | 4-6% | |
| Iron | 10-15% |
*Percent Daily Values are based on a 2,000 calorie diet. Your daily values may be higher or lower depending on your calorie needs.
Key points about this nutrition information:
- High in protein: The chicken provides a significant amount of protein.
- Moderate in carbohydrates: Mainly from the breading and sauce.
- Contains some healthy fats: From the oil used in frying.
- Sodium content: Can be high due to the breading and sauce.
Remember, you can adjust the nutritional profile by:
- Baking instead of frying to reduce fat content
- Using less sauce to reduce sugar and sodium
- Serving with vegetables to increase fiber and vitamins
This chart is meant to give a general idea of the nutritional content. For precise values, you’d need to calculate based on the exact ingredients and amounts used in your preparation.
Variations to Try
Once you’ve mastered the basic Chicken Katsu recipe, why not try some variations?
- Cheese Katsu: Before breading, stuff a slice of cheese inside the pounded chicken breast for a gooey surprise.
- Katsu Curry: Serve your Chicken Katsu with Japanese curry sauce instead of the traditional Katsu sauce.
- Katsu Sandwich: Use your Chicken Katsu to make an epic sandwich with shredded cabbage and Katsu sauce.
- Baked Katsu: For a healthier version, try baking your breaded chicken instead of frying.
- Pork Katsu: Swap the chicken for pork cutlets to make Tonkatsu, another popular Japanese dish.
Serving Suggestions
Chicken Katsu is versatile and pairs well with lots of different sides. Here are some ideas:
- Traditional: Serve with steamed white rice and shredded cabbage.
- Katsu Don: Place the sliced Katsu over a bowl of rice and pour over a mixture of beaten egg and dashi stock. Until the egg is set, let it simmer.
- Salad: Serve alongside a fresh green salad for a lighter meal.
- Udon: Pair with a side of hot or cold udon noodles.
- Vegetables: Steamed or stir-fried vegetables make a great healthy side.
Storing and Reheating
Got leftovers? No problem! Here’s how to store and reheat your Chicken Katsu:
Storing:
- Let the Katsu cool completely.
- In an airtight container keep refrigerated for up to 3 days in an airtight container.
Reheating:
- For best results, reheat in the oven at 350°F (175°C) for about 10 minutes.
- If you have an air fryer, you may use that as well.
- Avoid microwaving if possible, as it can make the breading soggy.
Frequently Asked Questions
Q: Can I substitute chicken thighs for breasts?
A: Absolutely! Chicken thighs can be even juicier. Just make sure to pound them to an even thickness.
Q: Is there a gluten-free option?
A: Yes! Use gluten-free flour and gluten-free panko breadcrumbs. Make sure your Worcestershire sauce is gluten-free too.
Q: Can I make this ahead of time?
A: You can bread the chicken ahead of time and keep it in the fridge for a few hours before frying. Fry right before serving for the finest results.
Q: What if I don’t have mirin for the sauce?
A: You can substitute with a mixture of rice vinegar and sugar, or just leave it out. The sauce will still be tasty!
Q: Is Chicken Katsu healthy?
A: While it’s not the healthiest dish due to being fried, you can make it healthier by baking it instead. Serve with lots of veggies for a more balanced meal.
The History of Katsu
Katsu has an interesting history. It was invented in Japan in the late 19th century when the country was opening up to Western influences. The dish was created as a way to incorporate Western-style meat cutlets into Japanese cuisine.
Originally, katsu was made with beef, which was quite expensive at the time. It later evolved to use pork (tonkatsu) and chicken (chicken katsu), which were more affordable.
Today, katsu is a beloved dish not just in Japan, but all over the world. It’s a staple in Japanese restaurants and homes, and now, with this recipe, it can be a staple in your home too!
Wrapping Up
And there you have it – everything you need to know about making delicious Chicken Katsu at home. From the crispy, golden-brown exterior to the juicy, flavorful interior, this dish is sure to become a favorite in your household.
Never forget that cooking is all about experimenting and having fun.. Don’t be afraid to adjust the seasonings to your taste or try out different variations. The more you make it, the better you’ll get at perfecting your own personal Chicken Katsu style.
So, what are you waiting for? Grab those ingredients, heat up that oil, and get ready to impress your family and friends with your Japanese cooking skills. Happy cooking, and enjoy your homemade Chicken Katsu!
Chicken Katsu Recipe
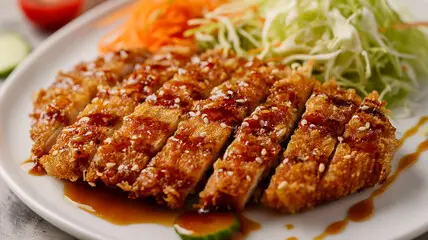
Chicken Katsu is a beloved Japanese dish that brings together the best of comfort food and culinary finesse. This recipe transforms simple chicken breasts into a crispy, golden delight that's sure to satisfy your cravings. With a crunchy panko coating and juicy interior, each bite offers a perfect balance of textures. Served with a tangy katsu sauce, fluffy rice, and crisp vegetables, it's a complete meal that's both filling and flavorful. Whether you're new to Japanese cuisine or a long-time fan, this easy-to-follow recipe will help you create restaurant-quality Chicken Katsu right in your own kitchen. It's an ideal dish for a family dinner, meal prep, or when you want to impress guests with your international cooking skills. Get ready to experience the irresistible crunch and savory goodness of homemade Chicken Katsu!
Ingredient List
For Chicken:
For the Katsu Sauce:
Instructions
recipe details
-
Prepare the Chicken
-
- Take your chicken breasts and place them between two pieces of plastic wrap.
- Using a meat mallet or rolling pin, gently pound the chicken until it’s about 1/2 inch thick.
-
- This step is important because it helps the chicken cook evenly and makes it more tender.
- Once you’ve flattened the chicken, season both sides with salt and pepper.
- If you’re using garlic and onion powder, sprinkle those on too.
- Set the seasoned chicken aside while we set up our breading station.
-
-
Set Up the Breading Station
-
- In one shallow dish, put your flour.
- In another dish, beat your eggs.
- In the third dish, pour your panko breadcrumbs.
- Line these dishes up in order: flour, egg, panko. This will be your assembly line for breading the chicken.
-
-
Bread the Chicken
-
- Dip it in the flour, making sure it’s completely coated. Shake off any excess.
- Next, dip it in the beaten egg, again making sure it’s fully covered.
- Finally, place it in the panko breadcrumbs. To ensure that the breadcrumbs stick properly, press them onto the chicken.
- Repeat this process with all your chicken pieces.
- If you have time, let the breaded chicken rest in the fridge for about 15 minutes.
- This improves the coating’s sticking power during fried.
-
-
Fry the Chicken
-
- In a big skillet, heat up about 1/4 inch of vegetable oil over medium heat.
-
- The oil should be heated but not smoking.
- Place the breaded chicken into the heated oil with caution. Avoid packing the pan too full; you may have to cook in batches.
- Fry until the chicken is cooked through and golden brown, 3 to 4 minutes on each side. A temperature of 165°F (74°C) should be reached inside.
- After cooking, move the chicken to a dish covered with paper towels so that any leftover oil may be drained.
-
-
Make the Katsu Sauce
- Combine the ketchup, sugar, mirin, soy sauce, and Worcestershire sauce in a small bowl.
- Taste and adjust the flavors if needed. You might want it a bit sweeter or saltier depending on your preference.
-
Serve and Enjoy!
-
- Slice the chicken into strips (this is traditional, but you can leave it whole if you prefer).
- Serve it with a side of steamed rice and some fresh vegetables like shredded cabbage or a simple salad.
- Don’t forget to drizzle that yummy Katsu sauce over the top or serve it on the side for dipping
-
